

Using Ollas in Raised Beds: A Complete Setup Guide
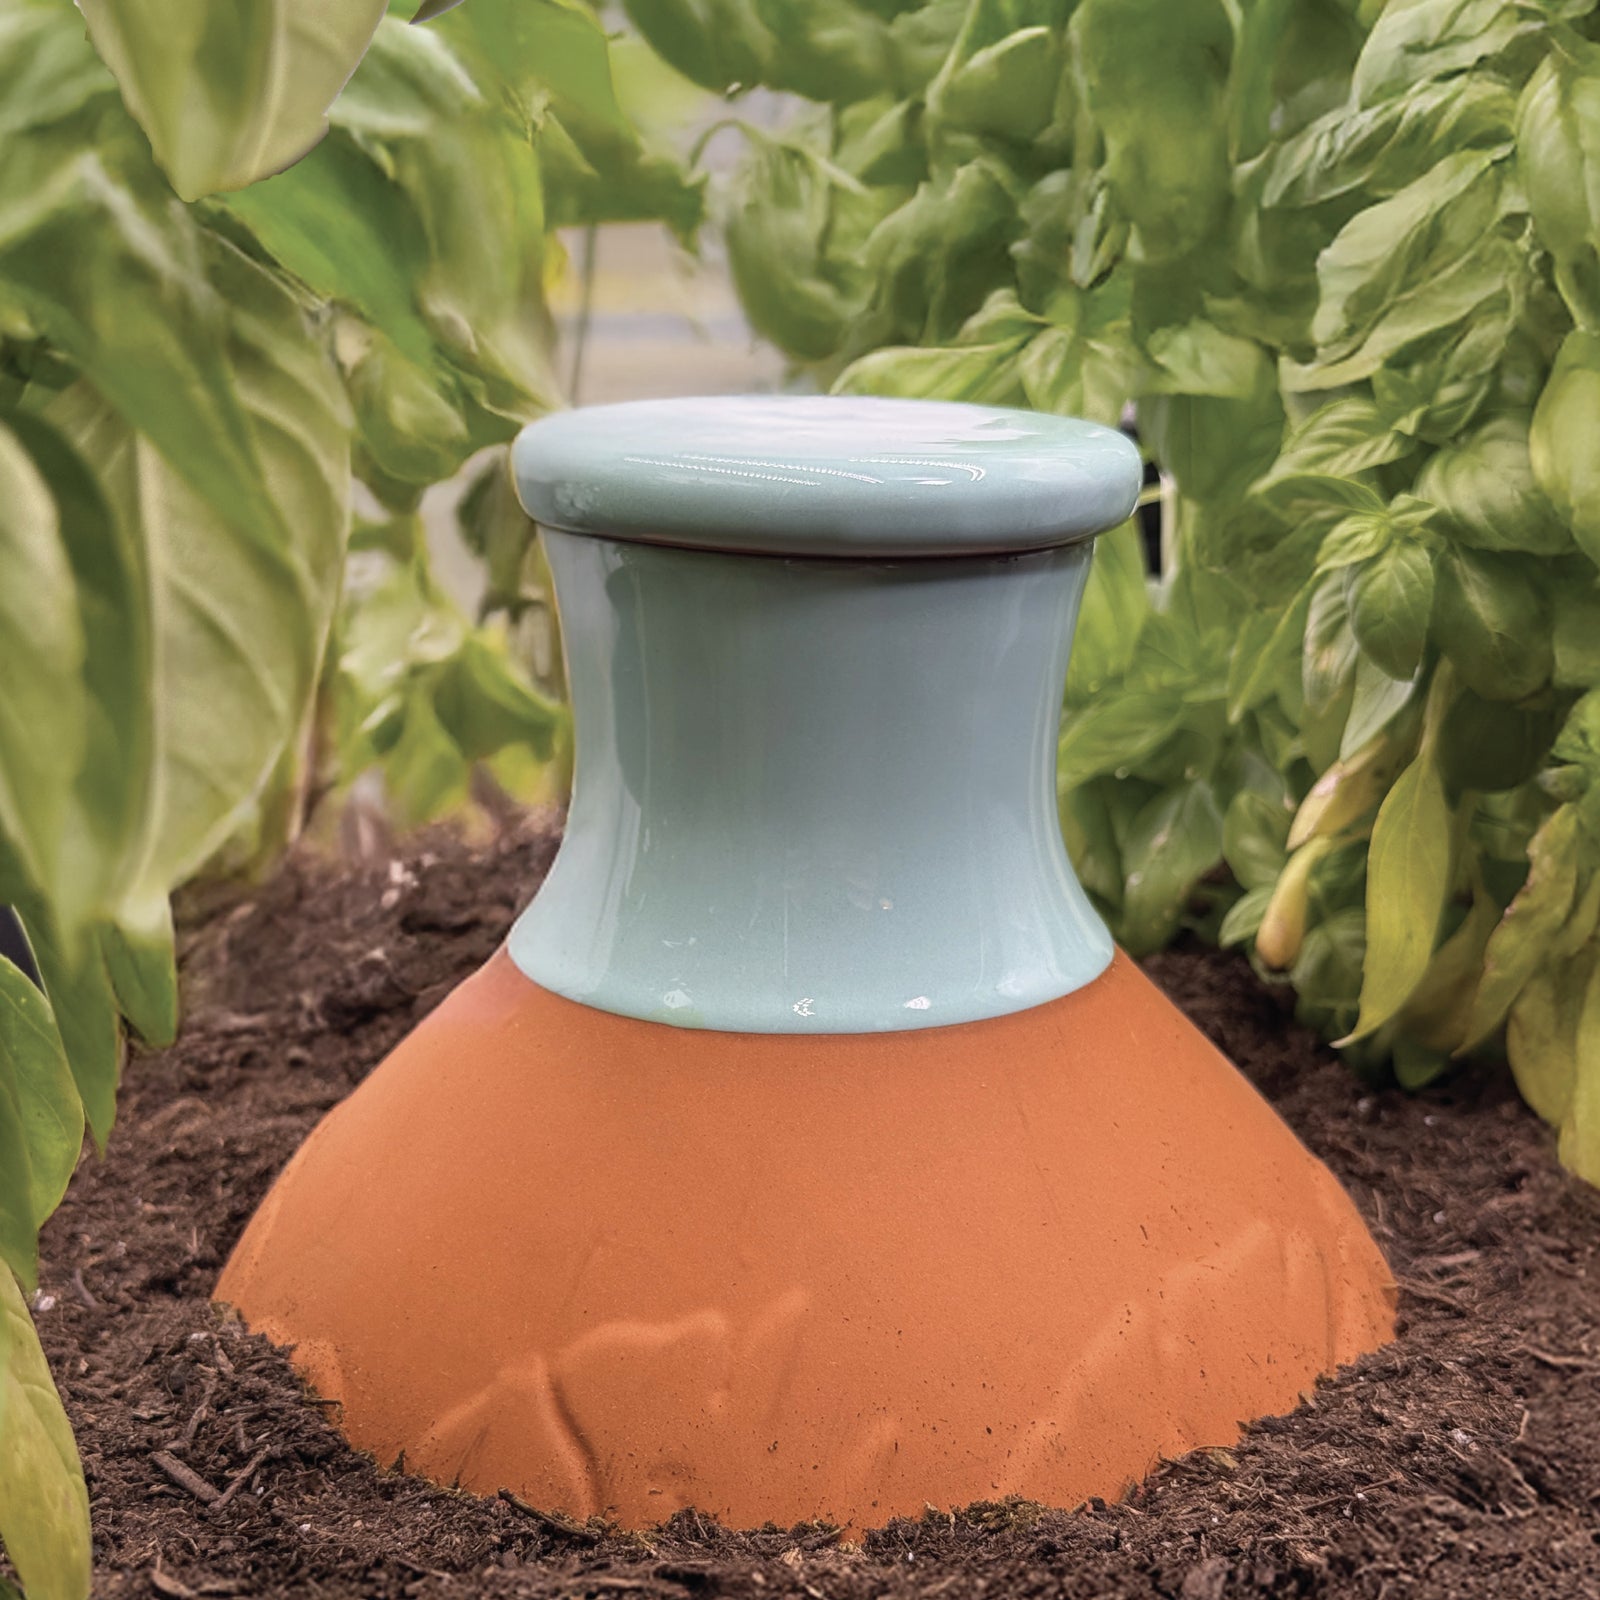
Raised beds are where olla irrigation works best. The soil column is deep enough to bury the pot fully, the bed dimensions are typically a great match for olla coverage zones, and the contained soil holds the wetted zone where it belongs. If you have raised beds and you’ve been hand-watering or running drip lines, switching to ollas usually cuts your watering time by 80%+ and improves plant performance through more consistent soil moisture. This guide is the complete raised-bed setup.
THE SHORT VERSION
01 · WHY RAISED BEDS WORK SO WELL
The geometry advantage of raised-bed ollas
Raised beds are built for a reason — deep, loose soil that drains well and stays workable. Those same qualities make them ideal for olla irrigation. The bed’s soil column is typically 12–18 inches deep, which is exactly the burial depth a 1.25-gallon Acqua Olla wants. The bed walls contain the soil so the wetted zone stays where you want it. And the dimensions — usually 4 feet wide because that’s the maximum reach across — match perfectly with the olla’s 15–20 inch wetted radius.
Compare this to in-ground gardens where the soil column is shallower than the olla, or to small containers where there’s no room for both the olla and the plants. Raised beds avoid both problems. For our complete raised-bed olla sizing guide, see our raised-bed sizing and spacing guide.
02 · SIZING BY BED DIMENSION
How many ollas you need per raised bed
Most home raised beds fall in one of three standard sizes: 4×4, 4×8, or 2×8. The Acqua Olla’s 1.25-gallon capacity and 15–20 inch wetted zone covers about 9–16 square feet per pot, which translates cleanly to these bed sizes.
A 4×4 bed (16 sq ft) needs exactly one Acqua Olla, centered. A 4×8 bed (32 sq ft) needs two ollas, spaced 4 feet apart down the long axis. A 2×8 bed (16 sq ft) is a special case — it’s long and narrow, so two smaller ollas spaced 4 feet apart work better than one central olla. For full sizing details, see how many ollas per square foot.
03 · THE INSTALL
Step-by-step raised-bed olla installation
Raised-bed installation is the most straightforward of any olla setup. The soil is already loose, the depth is right, the bed is contained. The six steps below cover the process.
01 · 4×4 bed
1 Acqua Olla
Centered, single olla covers the full bed. Most common home raised-bed size.
02 · 4×8 bed
2 Acqua Ollas
Spaced 4 feet apart along the long axis. Each covers half the bed.
03 · 2×8 bed
2 Acqua Ollas
Spaced 4 feet apart down the length. Narrow geometry needs two smaller-zone ollas.
04 · 4×12+ bed
3 Acqua Ollas
Spaced 4 feet apart. Three ollas cover the full bed evenly.
If your raised bed is already planted, you can still retrofit an olla — just pick a spot with the least root disturbance and carefully excavate, taking care to minimize damage to nearby plants. For broader install guidance, see how to install an olla in a raised bed, pot, or garden.
04 · PLANT LAYOUT AROUND OLLAS
How to arrange plants around a raised-bed olla
Plant arrangement is where many gardeners overthink it. The olla’s wetted zone is roughly circular, extending 15–20 inches outward. Plants placed within that radius receive water; plants outside it don’t. So just plant in a ring or grid around the olla, keeping plants 12–18 inches from the center.
For 4×4 beds with one central olla, you can fit 8–12 plants in the wetted zone — depending on plant size and spacing requirements. For tomato or pepper spacing specifically, see best ollas for vegetable gardens and tomato plants. For best-plant-match guidance, see what plants thrive with olla irrigation.
01 · Mark olla positions
Use a stake or marker to identify where each olla will go. For 4×4 beds, the center. For 4×8 beds, 2 feet in from each short end.
02 · Pre-soak the ollas
While preparing the bed, submerge each olla in water for 15–30 minutes to prime the clay walls.
03 · Dig the holes
At each marker, dig a hole slightly wider than the olla and deep enough that only the neck and lid will sit above soil.
04 · Place and backfill
Lower each olla into its hole, then backfill the soil around it in firm layers. Tamp as you go to eliminate air gaps.
05 · Fill the reservoirs
Pour water into each olla through the top opening to within an inch of the rim. Replace lids firmly.
Plant around the ollas
Place transplants and seeds within 12–18 inches of each olla center. The wetted zone reaches that radius.
05 · PRE-SEASON SETUP
Get the bed ready before installing
A few small steps before installation pay off all season.
- Test soil moisture before installing. Raised-bed soil should be evenly moist throughout, not bone dry or saturated. Water the bed lightly the day before installation.
- Confirm bed depth. The olla needs to be buried up to the neck. Confirm the bed has at least 14 inches of soil depth before installing.
- Remove rocks from the install spot. A large rock under the olla can prevent firm backfill and create an air gap that disrupts water release.
- Plan for refill access. Position the olla where you can easily reach it for weekly refilling. Don’t bury it behind tall plants.
- Add mulch after planting. A 2–3 inch mulch layer around the olla slows surface evaporation and protects against weeds, extending refill intervals.
06 · SEASONAL CARE
Maintaining raised-bed ollas through the year
Raised-bed ollas need almost no ongoing maintenance beyond refilling. Weekly in summer, biweekly in spring and fall, monthly in winter (if you leave them in). For full refill guidance, see how often to refill an olla.
In freezing climates, remove the olla before the first hard frost. Trapped water expands and cracks the clay. Reinstall in spring once the bed is workable. For lifespan and freeze handling, see how long olla pots last. For year-round cleaning, see how to clean and maintain your olla pot.

Raised-bed olla setup is the cleanest olla install — right depth, right dimensions, contained soil. Once installed, weekly refills are the only maintenance through the growing season. For more on spacing if you have multiple ollas, see olla spacing — how far apart to place ollas. For complete burial-depth details, see how deep to bury an olla.
FAQ · COMMON QUESTIONS
Frequently Asked Questions
How many ollas do I need for a raised bed?
One Acqua Olla per 4×4 bed, two per 4×8 bed, three per 4×12 bed. Each 1.25-gallon olla covers 9–16 square feet through its 15–20 inch wetted radius.
Where should I place the olla in a raised bed?
Centered for square beds (4×4). For rectangular beds, space ollas 3–4 feet apart along the long axis with one olla per ~16 square feet.
How deep should I bury an olla in a raised bed?
Up to the neck — only the lid and 1–2 cm of the neck should sit above the soil surface. For a 1.25-gallon Acqua Olla, that’s about 12–14 inches. See how deep to bury an olla for full guidance.
Can I install an olla in an already-planted raised bed?
Yes, but carefully. Pick a spot with the least root disturbance, excavate slowly, and minimize root damage to nearby plants. Best done early in the season when plants are young.
How often do I refill the olla in a raised bed?
Weekly in summer, biweekly in spring and fall, monthly in winter. Hot, dry, or sunny weeks may require twice-weekly refills. See how often to refill an olla for details.
Do raised-bed ollas work in winter?
In mild climates, yes — year-round operation. In freezing climates, remove the olla before the first hard frost to prevent crack damage from expanding ice.
Can I combine ollas with drip irrigation in the same bed?
Yes, though it’s rarely needed. Ollas handle the core watering and any drip lines can supplement plants outside the wetted zone. Most gardens don’t need both.
What if my raised bed is shallower than 14 inches?
Use a smaller olla — a 1/2-gallon olla works in beds with 10 inches of soil depth. Or build up the soil with a 2–4 inch crown around the olla install spot.
References
01 Bainbridge, D. A. (2001). “Buried clay pot irrigation: a little known but very efficient traditional method of irrigation.” Agricultural Water Management, 48(2), 79–88. DOI: 10.1016/S0378-3774(00)00119-0
02 Food and Agriculture Organization (FAO). “Pitcher irrigation: A simple, low-cost irrigation technique.” FAO Agricultural Technology Series. fao.org